Larkin Story

My wife Barbara was going to surprise me by buying us kayaks for my birthday in September 2002. Two weeks before my birthday I saw something online about building strippers and said to her “Wow, we should build some kayaks!” After she got over the disappointment of having her surprise deflated, we got excited about building them. My neighbor told us about Newfound. I visited them, got a thorough tour of the facility, and was impressed with the people and their kits, and several weeks later owned a couple of Explorer hybrid kits.
· I initially signed on for a class from Newfound but it never worked out due to scheduling problems, but that turned out to not be a problem. 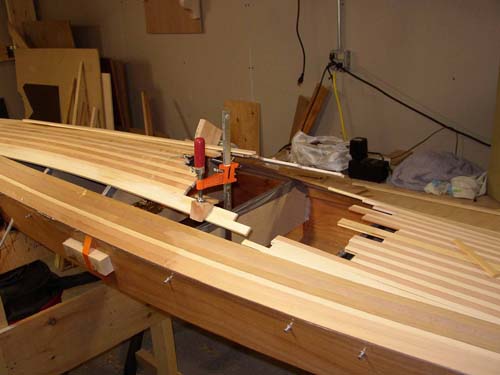 I’ve had a fair amount of woodworking experience, I lived close to Newfound’s shop, and Michael Vermouth assured me that I could email, call, or come by any time for assistance. And that certainly proved true. For those with little or no woodworking experience I would consider the class mandatory. While the kits are complete, the instructions very good, and Newfound is always ready to help, the challenge of this undertaking is not to be underestimated. Skill with handtools helps a lot, careful planning, adherence to instructions, and gobs of patience and determination are needed. I found working on the boats almost every day, even if only for an hour or two was a big help in that it kept up momentum. Lose momentum and, for me at least, that can sap my determination and enthusiasm.
· I would highly recommend reading other books and web sites on strip building to round out your knowledge, perhaps get alternative ways of doing things to what Newfound suggests, and to give you the confidence that there is some latitude in some of the construction methods.
· I was most impressed with the care and thoroughness of the kits. Everything was well labeled and complete.
· The finger joints Newfound provides for the plywood panels are helpful in lining up the panel sections. Don’t be afraid to clean them up some to get a snug, flush fit. Don’t just assume they should fit and start banging them together to make them fit.
 · In beveling the edges of the plywood panels prior to stitching and gluing them together, I found it very helpful to study the angles at which they come together, as shown on the Newfound design drawing provided with the kit. The drawing shows a cross section of the hull every foot so you can see how the bevel should change as you travel from bow to stern.
· Of course I was nervous with my first use of the epoxy. How precise should I be, is it warm enough in the room, how fast will it cure, on and on. But I quickly learned that it’s a very forgiving system, user-friendly, and a great product. I now use my leftover epoxy for some applications in my other woodworking.
 · Stitching was not my favorite activity. I decided aircraft safety wire pliers weren’t worth the expense (they quickly spin and twist the wire tight) and it turned out that regular pliers were fine. The real “fun” was when all panels were wired flat on the table and it was time to form them up into the hull shape with more wires. Given that 27 hands would be helpful, I don’t recommend doing this alone, although I did.
· Gluing the panels was more fun. Plastic bags are, I think, essential for piping out thickened epoxy with some accuracy and little mess. It was a learning experience to see how much the epoxy can imperceptibly travel while it’s curing even though you think it’s too thick to do so. So err on the side of greater thickness if you envision that flowing epoxy will go where you don’t want it. Space is tight in the bow and stern, but no one will see it; just be as neat as you can be without obsessing over it. And remember that some of that mess will get buried in the end-pours.
 · Gluing on the sheer clamp was not difficult. You’ll just need lots of clamps; and that’s true throughout the building process. I think in one operation, perhaps it was gluing the sheer clamps, I used about 35 clamps. Cheap “C” and spring clamps were indispensable.
· Beveling the sheer clamp was fun. I got to use a hand plane and to exercise some artistic judgment in getting the right angle.
· I hated putting in the forms. I was very uneasy about their location, both bow to stern and vertically, didn’t like sticking pins through the hull to hold them (more holes), didn’t use enough hot melt glue initially so they popped loose; altogether an annoying and stressful experience. Any advice you might ask? Do your best and gut it out.
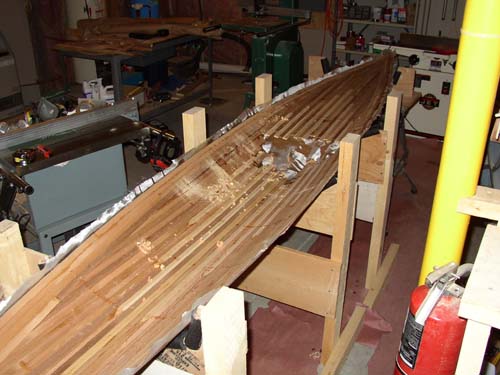
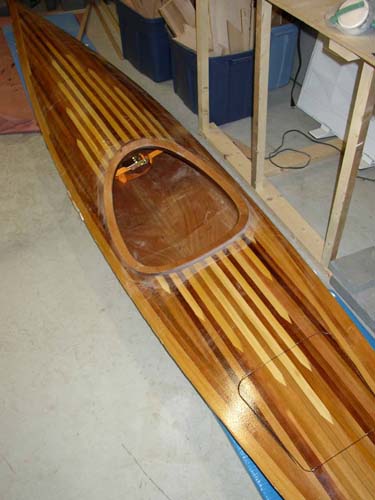
· I loved stripping. I chose to go the stapleless route since I had the time. However, I couldn’t figure out how to clamp the first strip or two at the sheer clamp so I stapled them. There’s a lot of stress on these first strips as they curve in two directions at once, and these were my first strips when I was least sure of myself. But from then on it was all stapleless; a clamping challenging. Selecting and fitting strips was very enjoyable. Pay attention to color and you can do practically any design you want. Wetting the strips with water or lacquer thinner will help you envision the color after varnishing. Red cedar is highly variable.
· For fun, I milled some of my own strips out of redwood and basswood. I would only recommend this if you really want to. It’s not easy finding the wood, and milling it to the exact same thickness as the strips provided by Newfound is not easy. Also, I ordered a ¼ inch set of cove and bead router bits, but it turned out that a ¼ inch is not always a ¼ inch. There was a slight variation between Newfound’s bits and the ones I purchased, so fitting the two different strips together whenever they met was a pain. In spite of the difficulties I’m glad I did it because I got some experience and I have a more distinctive boat.

· Stripping around the cockpit was a huge challenge. The strips are really being contorted here and they simple refuse to cooperate. It takes patience and creativity with clamps to make it happen. Also, instead of using yellow glue like all the other strips, I switched to epoxy to give me more working time to set up my Rube Goldberg clamp system.

· Fitting the last strips on each side was very time-consuming. I had narrow and long gaps to fill so there was a lot of hand-planing and test fitting. I had to trim off the cove and bead on adjoining strips to be able to get it in.
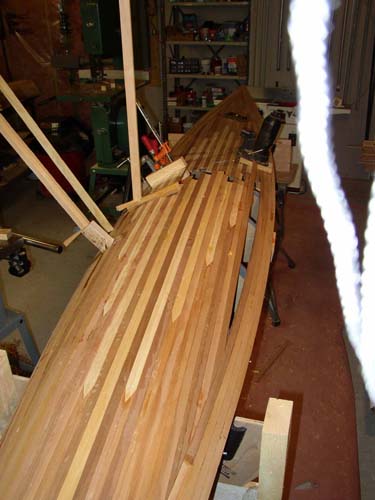
· Smoothing the surfaces for glassing and epoxy, using planes and hand-sanding with the feather-board, was fun. I liked to be fussy at this stage.
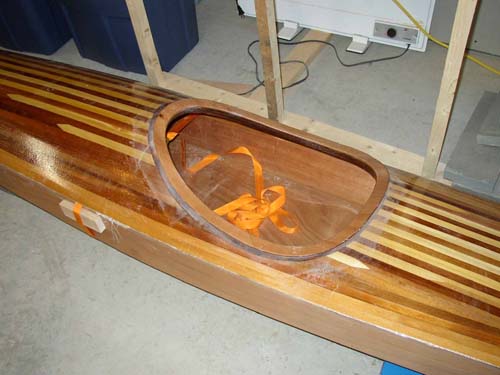
· What fun cutting out the cockpit opening and fitting in the short strips to accept the coaming. To each his own.
· For the coaming on one boat I used the Newfound parts. The only wrinkle was that the top wide piece of coaming was slightly too large in circumference, so I simply sawed off a very short piece on each side to reduce the circumference. On the other boat I made my own coaming out of pine and ash cut from our property; again, just for fun.
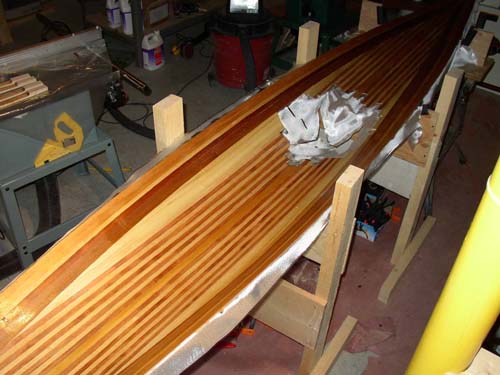
 · I enjoyed glassing the boats inside and out; I think because the materials (fiberglass and epoxy) work so well, and because it transforms the appearance of the boat to something much more beautiful.
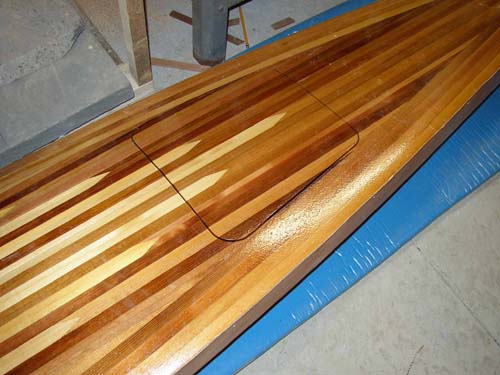
· Cutting the hatch openings was stressful. You only get one shot. I checked the location 3 or 4 times before cutting. I used a series of holes made with a very small drill bit to get a starting hole, then finished with a jig saw with a fine toothed blade. It turned out to be a trouble-free operation.
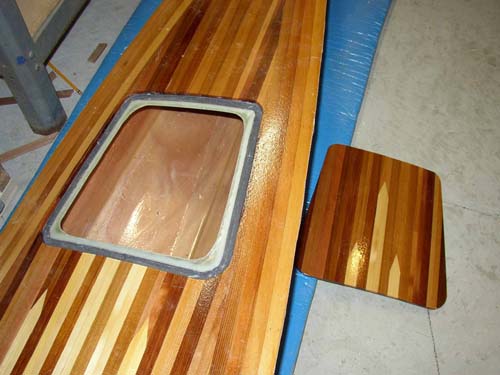
· Just to get some more experience with fiberglass I made my own hatch cover lips with glass and epoxy rather than using the Newfound pieces. Methods are available from a variety of sources for doing this. It worked out fine. To hold the hatches on I use the bungy method whereby attachment points are installed inside the boat and on the underside of the hatches. No straps or bungies show. But it’s not the most convenient system. It’s not easy getting the hatches open, and I wonder about hatch security. I think next time I would opt for manufactured hatches. They’re plastic but the security appeals to me.
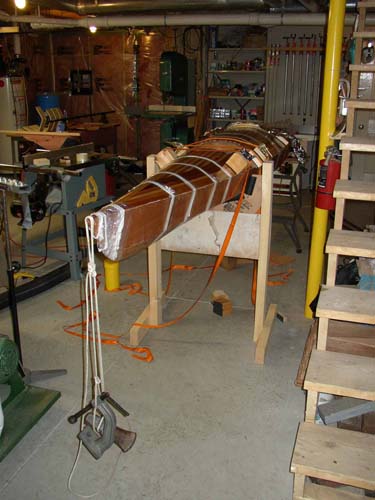
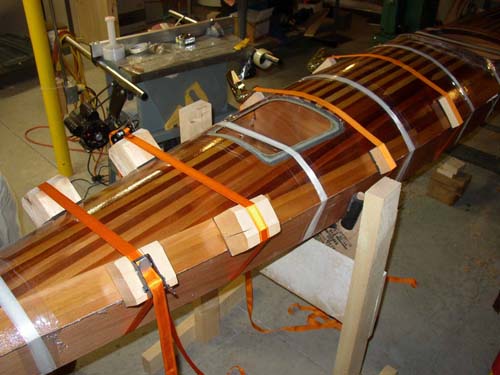
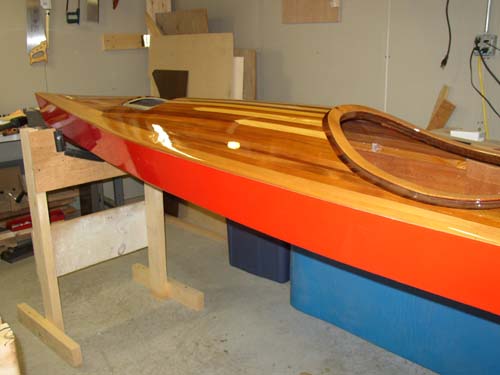
 · I was by myself for the joining of the hull to the deck. An assistant would have helped greatly. Doing the first boat took me 7 hours. The second took 2. Chalk the 7 hours up to inexperience and a deck that had flattened out a little in the weeks after it was glassed but before attaching it to the deck. Thus getting it to fit tight to the sheer clamp was, once again, an exercise in creative clamping. I recommend having several band clamps, adhesive-less stretchy film (available from Lee Valley), and fiber packing tape. I worked from one end to the other, every foot putting on the strap clamp, then several wraps of the film, then several wraps of the packing tape, then moving on down the hull a foot or so. Don’t put too much thickened epoxy on the sheer clamp and underside of the deck edge, or you’ll have a mess to clean up as most of it gets squeezed out, but be sure to put enough. A judgment call. Also, the very tip my bows and sterns didn’t want to sit flush to the hull during gluing so I simply weighted them down by suspending heavy weights from ropes hung over them.

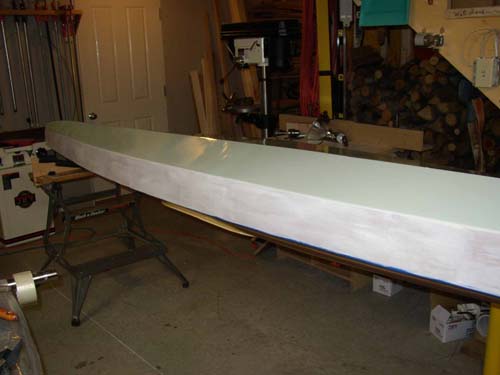
· I added two or three fill coats of resin to fill the cloth, then began the sanding. Nothing surprising here, just a lot of work if you want a nice surface.
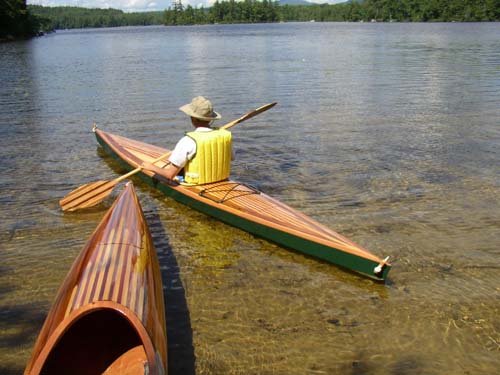
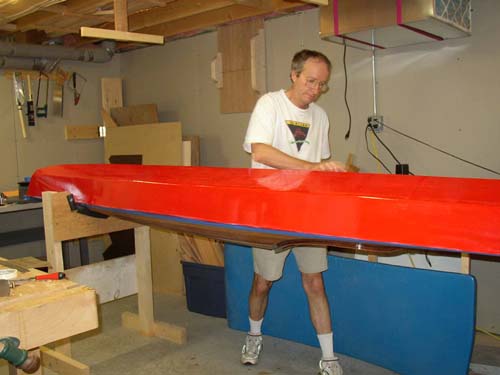
· I loved varnishing. It’s a nice material (at least the brand supplied by Newfound) that goes on easily with a foam brush. I put 6 coats on the decks. We wanted painted hulls. That appealed to us more than varnished plywood. We used a marine enamel; two primer coats and 2 or 3 finish coats (red needed 3, green 2). To get a crisp edge between the paint and varnish, simply use high quality masking tape and firm it down well. I ran my thumbnail along the tape edge to be sure it was tight to the surface and paint couldn’t seep under it.
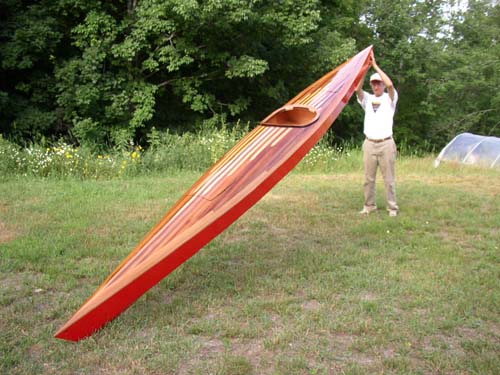
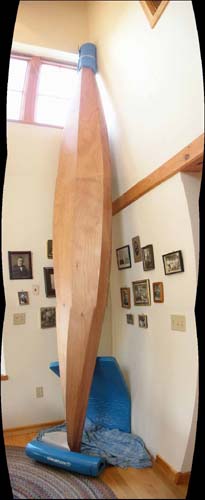
· Newfound will tell you exactly how much thickened epoxy to mix for the end-pours. “Simply” stand the boats on end and pour it in using the cup on a string method. We have a high ceiling in our dining room so that’s where we did it. We actually had someone come over and they didn’t even ask why we had a vertical kayak in our dining room. No comment whatsoever. Must not have been boat people.
· I don’t know how many hours I spent. I don’t need to know, although the elapsed time was about 7 months. It’s not a contest. If I was racing the clock I wouldn’t have fussed over things as much. The results would have suffered. As much time as I spent I could have spent more. At some point you have to say enough and that’s a personal decision. I just know I enjoyed the process thoroughly and am very pleased with the results.
· A word about tools. The essentials in my opinion are a small good quality hand plane, a featherboard, one of those rasps that Newfound sells, and a good quality saw. I found a stationary sander ( I clamped a belt sander on its side to my workbench) essential for shaping feathered ends of strips. And you’ll go through lots of paper towels, tape, drop clothes, and other expendable supplies. Don’t even think about trying to save here.